Tuesday, November 12, 2013

Shape tween


To create these shape tweens I first extended the timeline out to 60 frames. I then inserted a key frame at 60. After that i drew the first shapes on frame one. Next, i would draw the final picture on frame 60. Finally, I inserted a shape tween and the tween was complete. The only extra thing I had to do to the words was break it apart twice.

Monday, November 11, 2013

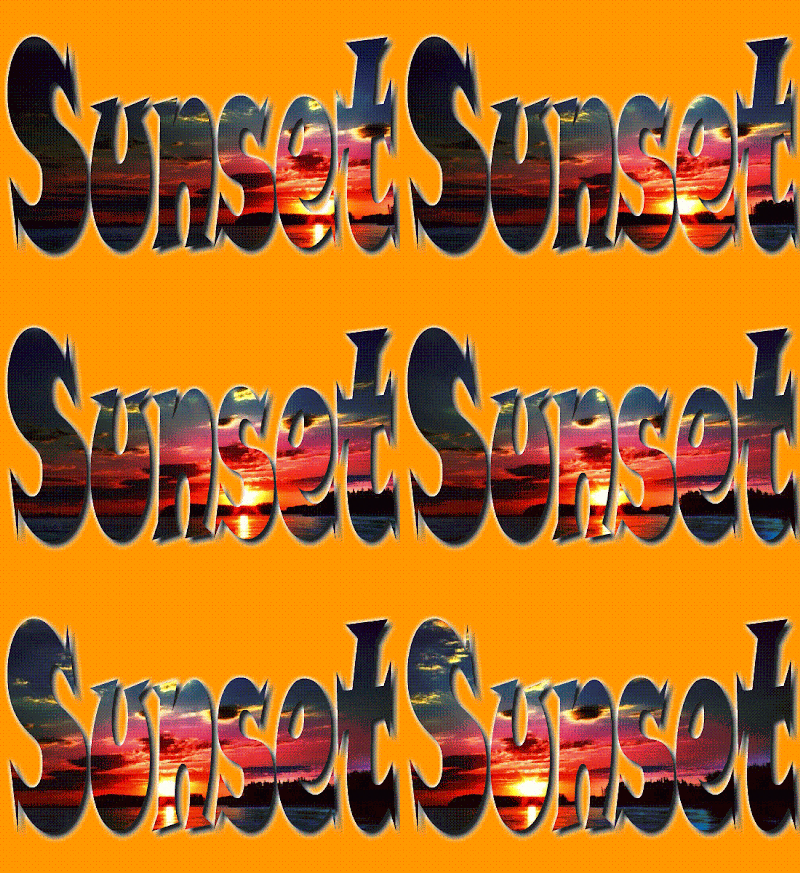
sunset powerclip

For this I took a picture of a sunset then stretched it out so it was larger than the stage. After that I added a motion tween so the sunset moved across the screen. Then I added the text on top and copied it. Then I put one of the texts on the bottom and joined the top one to the sunset with a mask. Finally i added an orange background , drop shadow and glow to the text.

Wednesday, October 16, 2013

Pop Art

To do this pop art I created the top left corner picture first. To do this I added rectangles on angles and coloured them different colours. After this I copied the picture 4 times into one picture. The final step was to change the hue on all of them so that the colours were different.

Wednesday, October 9, 2013

Motion Blur

To do this motion blur i selected the whole car, then went into motion blur. Next, I increased the blur up to 999 and changed the angle to -2. After that I created the "levels" layer 3 times and the picture layer 3 times. I then linked them all together. The final step was to play with the gradients so that the blur was only on the back half of the car.

Animal Blend

For this photo I started with a polar bear and a walrus. I then cut out the walrus head and pasted it onto the polar bear. I then used the clone stamp tool to blend them together. Also I used the eraser tool on a reduced opacity to blend the edges. The final thing i did was use the quick select tool to delete all the skin that you could see through the whiskers. 

Rainbow Eye

For this effect I got the picture in black and white. Then I created a new layer. After that I coloured each section in the order of the rainbow. The final step was to change it to overlay.

Tilt Shift


For this effect we tried to make everything look miniature. To do this we had to get an overhead view on an angle. Next, we had to blur the outside but leave the subject or main object not blurred. Then we had to pump up the contrast so that the images really popped and looked kind of like plastic. This creates an effect were they look like miniature toys.

Crack and Peel Effect


For this effect I tried to make it look as if the model was made of glass and had two bullet holes in her face. To do this I put a picture of glass over here face, then reduced the opacity, then I multiplied it so you could easily see her face through it. Also, for two of the picture I changed the hue, saturation, and lighting so her face would change colours.

Monday, September 30, 2013

Blog Question 2

Ethics, to me, means what I believe is good and bad. It is my moral values and what I think the difference between right and wrong is. Aesthetics, to me, means what looks good and makes me happy. It is what I think looks correct. I think that it is okay to digitally manipulate a photo if you have the persons permission. If it is someone like a model it is both aesthetically and ethically correct to manipulate them. But if you don't have their permission it is not ethically correct. For example I don't think they should change photos of places or news stories. Especially pictures of war and crime. I think that these photos should not be manipulated because then they are no longer telling the truth to people.

Liquify Tool MMA fighter

Original
For this photo I used the liquify tool to make his
right arm larger and his left arm smaller.
I used the warp tool, bloat tool, and
pucker tool to do this. 


Thursday, September 26, 2013

Blog Question 1

If you can digitally alter an image very quickly and easily, then photographic evidence doesn't mean much. It only takes us a matter of minutes to alter an image and we are not professionals. Because we can alter images so easily it is very hard to convict someone of a crime with only a picture. You need an eye witness to be 100% sure. If I was accused of a crime I would make sure to argue the case that the photo had be altered. I would tell them that i was Photo-shopped  into the picture and it wasn't even me there originally. Because of all of this photographic evidence is very hard to prove now.

Movie Poster


Folders as of September 26, 2013


Healing and clone stamp tool


Monday, September 23, 2013

Susan Blue


These pictures are of Susan Blue selling a Lamborghini and on the moon. for these pictures all we did was select her out of her original photo and then paste her in these. Then we re-sized her to make her look correct. Also, on the moon I added a speech bubble to her.

Friday, September 20, 2013

Lamborghini power clip

For this effect I took my picture of the edited Lamborghini, which i changed the colour on, and put it behind writing. To do this I took the Lamborghini picture and the added text in front of it. I then made the letter very large. After this I selected the letters using the magic wand and added a levels mask. Then I re-arranged the letters so they were near the bottom. Finally I joined the level mask to the Lamborghini picture and the text shows through. I then edited my text so it look a little better and I was done.

Derrick Rose Pop-out

This is a picture of Derrick Rose going for a slam dunk. To do this I first created multiple layers the same then  i created a frame around the bottom three quarters or him. Then I added a stroke to frame this part. Once that was done I altered the perspective of the frame so it appears somewhat flat. Then I selected the top half of him and used clipping masks to bring that half in front of the frame. After that i added a radial gradient with blue and green in the background.

6 colours of Lamborghinis

For this effect I took the original Lamborghini and changed the colour six times by using the replace colour option. To do this I had to use the eyedropper tool and select the Lamborghini. I then had to click the plus eyedropper and select the rims, reflection and any other part of the Lamborghini that hadn't already been selected. I then changed the colour of the six cars. Then I dragged and dropped them all into the same picture and re-sized them so they were the same. Then I added the price tags and the title.

Monday, September 16, 2013

Beach Party Vector Graphics

To create this image I first added the sun and then transformed it so that it apears as if it is shinning straight at the beach. I then added All of the words. Next, I modified the words so they had a small drop shadow and a slight bevel. This made them much easier to see and read. Then I added the banana and I changed it so it had a yellow neon glow and a yellow glass inside. After that is moved that layer so it was infront of the title layer but behind the who, what, where layer. I then added the dove in the background. Next I added The swimmer. I added a blue neon glow to him and a "toy" inside. Then I added the cupcake with a neon purple glow. Finally I added the feet and tryed to change the persepective so they apear on the ground.

Vegtable Face

To make this vegtable face we followed a tutorial. This tutorial was on selecting so all of the pieces were originally sperate. We first took the melon or his heda and moved it to the open space. Then we did the eyes. To do this we selected the blue berries using the eliptical tool and move them onto the orange rings. The we added the mouth by selecting the kiwi. After that we added the nose using the magic selection tool. Next I added the eyebrows by using the same tool. Then I added The bow tie using the lasso tool. Nect is used the the magnetic lasso tool to added his ears. Finally I added his hat and he was done.

Colour Splash

This is a colour splash of m&m's. To do this we took the original photo and made a copy of it. We then took the saturation all the way down so that the pic was black and white. This added a levels mask so it looked balck and white. We then used tohe opposite colour to drill holes into the mask so that the colour would shine through. That is how we got the colour to come through in only those parts.

3 Picture Blend


This picture is a 3 picture blend. To start I used the crop tool to stretch out the image so that both flags fit on the sides. Then I added a mask layer just below both flags. This made it so the gradient didnt cover the whole photo. Then I used the gradient tool to blend all the pictures together.


Friday, September 13, 2013

Mirrored Text

This is a mirrored text effect of my name. To do this I created a grey background and black top half. Then I wrote my name above those. Next I created a copy of my name and flipped it over. After that I reduced the opacity. Then i used the gradient tool to fade out part and blend them together.